Temperature, Humidity and PM2.5 Air Quality Sensor with Arduino
I built a really cool little temperature and air quality sensor that reports data to particle.io events and from there into influxdb cloud.
With Free Dashboards!!
Yes I mean free as free can get. Particle.io, free (to 100 devices). InfluxDB cloud, free (to (x) amount of stats). We’re not talking about a lot of stats here, but after many hours of research for a free dashboard solution this was the absolute best!
InfluxDB cloud dashboards look really nice as well.
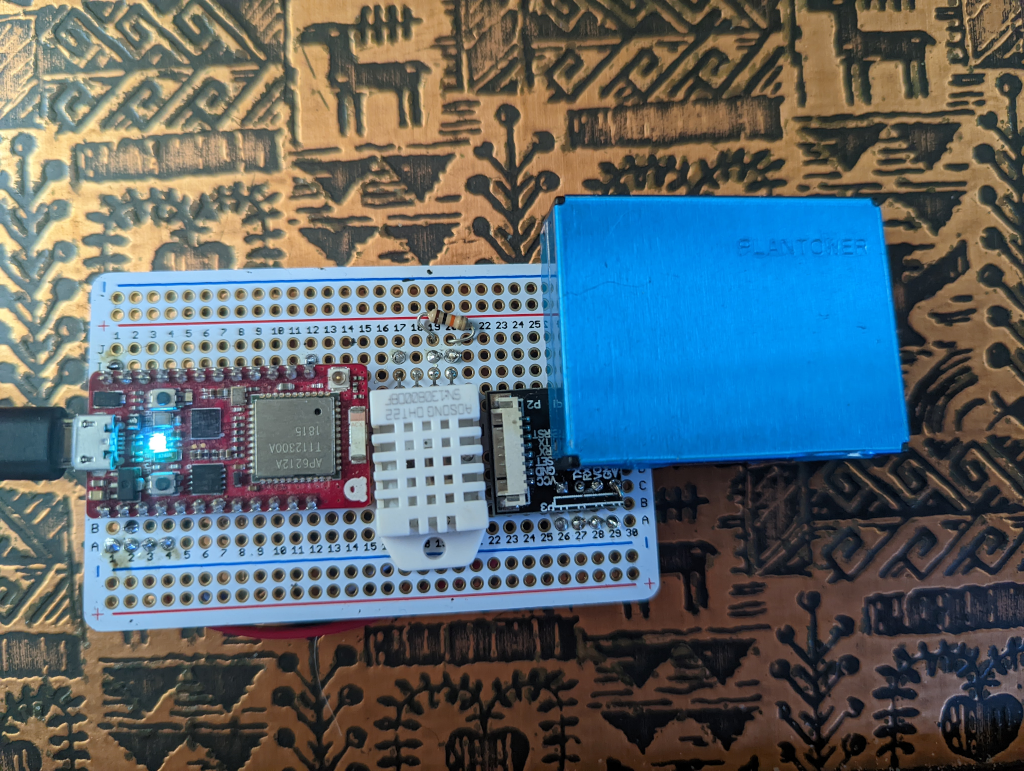
Build Components
- RedBear Duo github
Note, particle.io has since aquired RedBear labs and the Duo is old, yet still available in some places. You may also want to try particle devices like Argon instead of a redbear.
- DHT22 Temperature/Humidity sensor adafruit
- PM2.5 Air Quality Sensor and Breadboard Adapter Kit - PMS5003/PMS7003 adafruit
Note, I used a slightly different adapter, and it was lame to have to order it once I realized the PMS7003 I ordered did not come with an adaptor! The adafruit link above should get you hooked up. These air quality sensors come in different flavors just make sure you have a breakout board along with it when you order!
Software
Steps
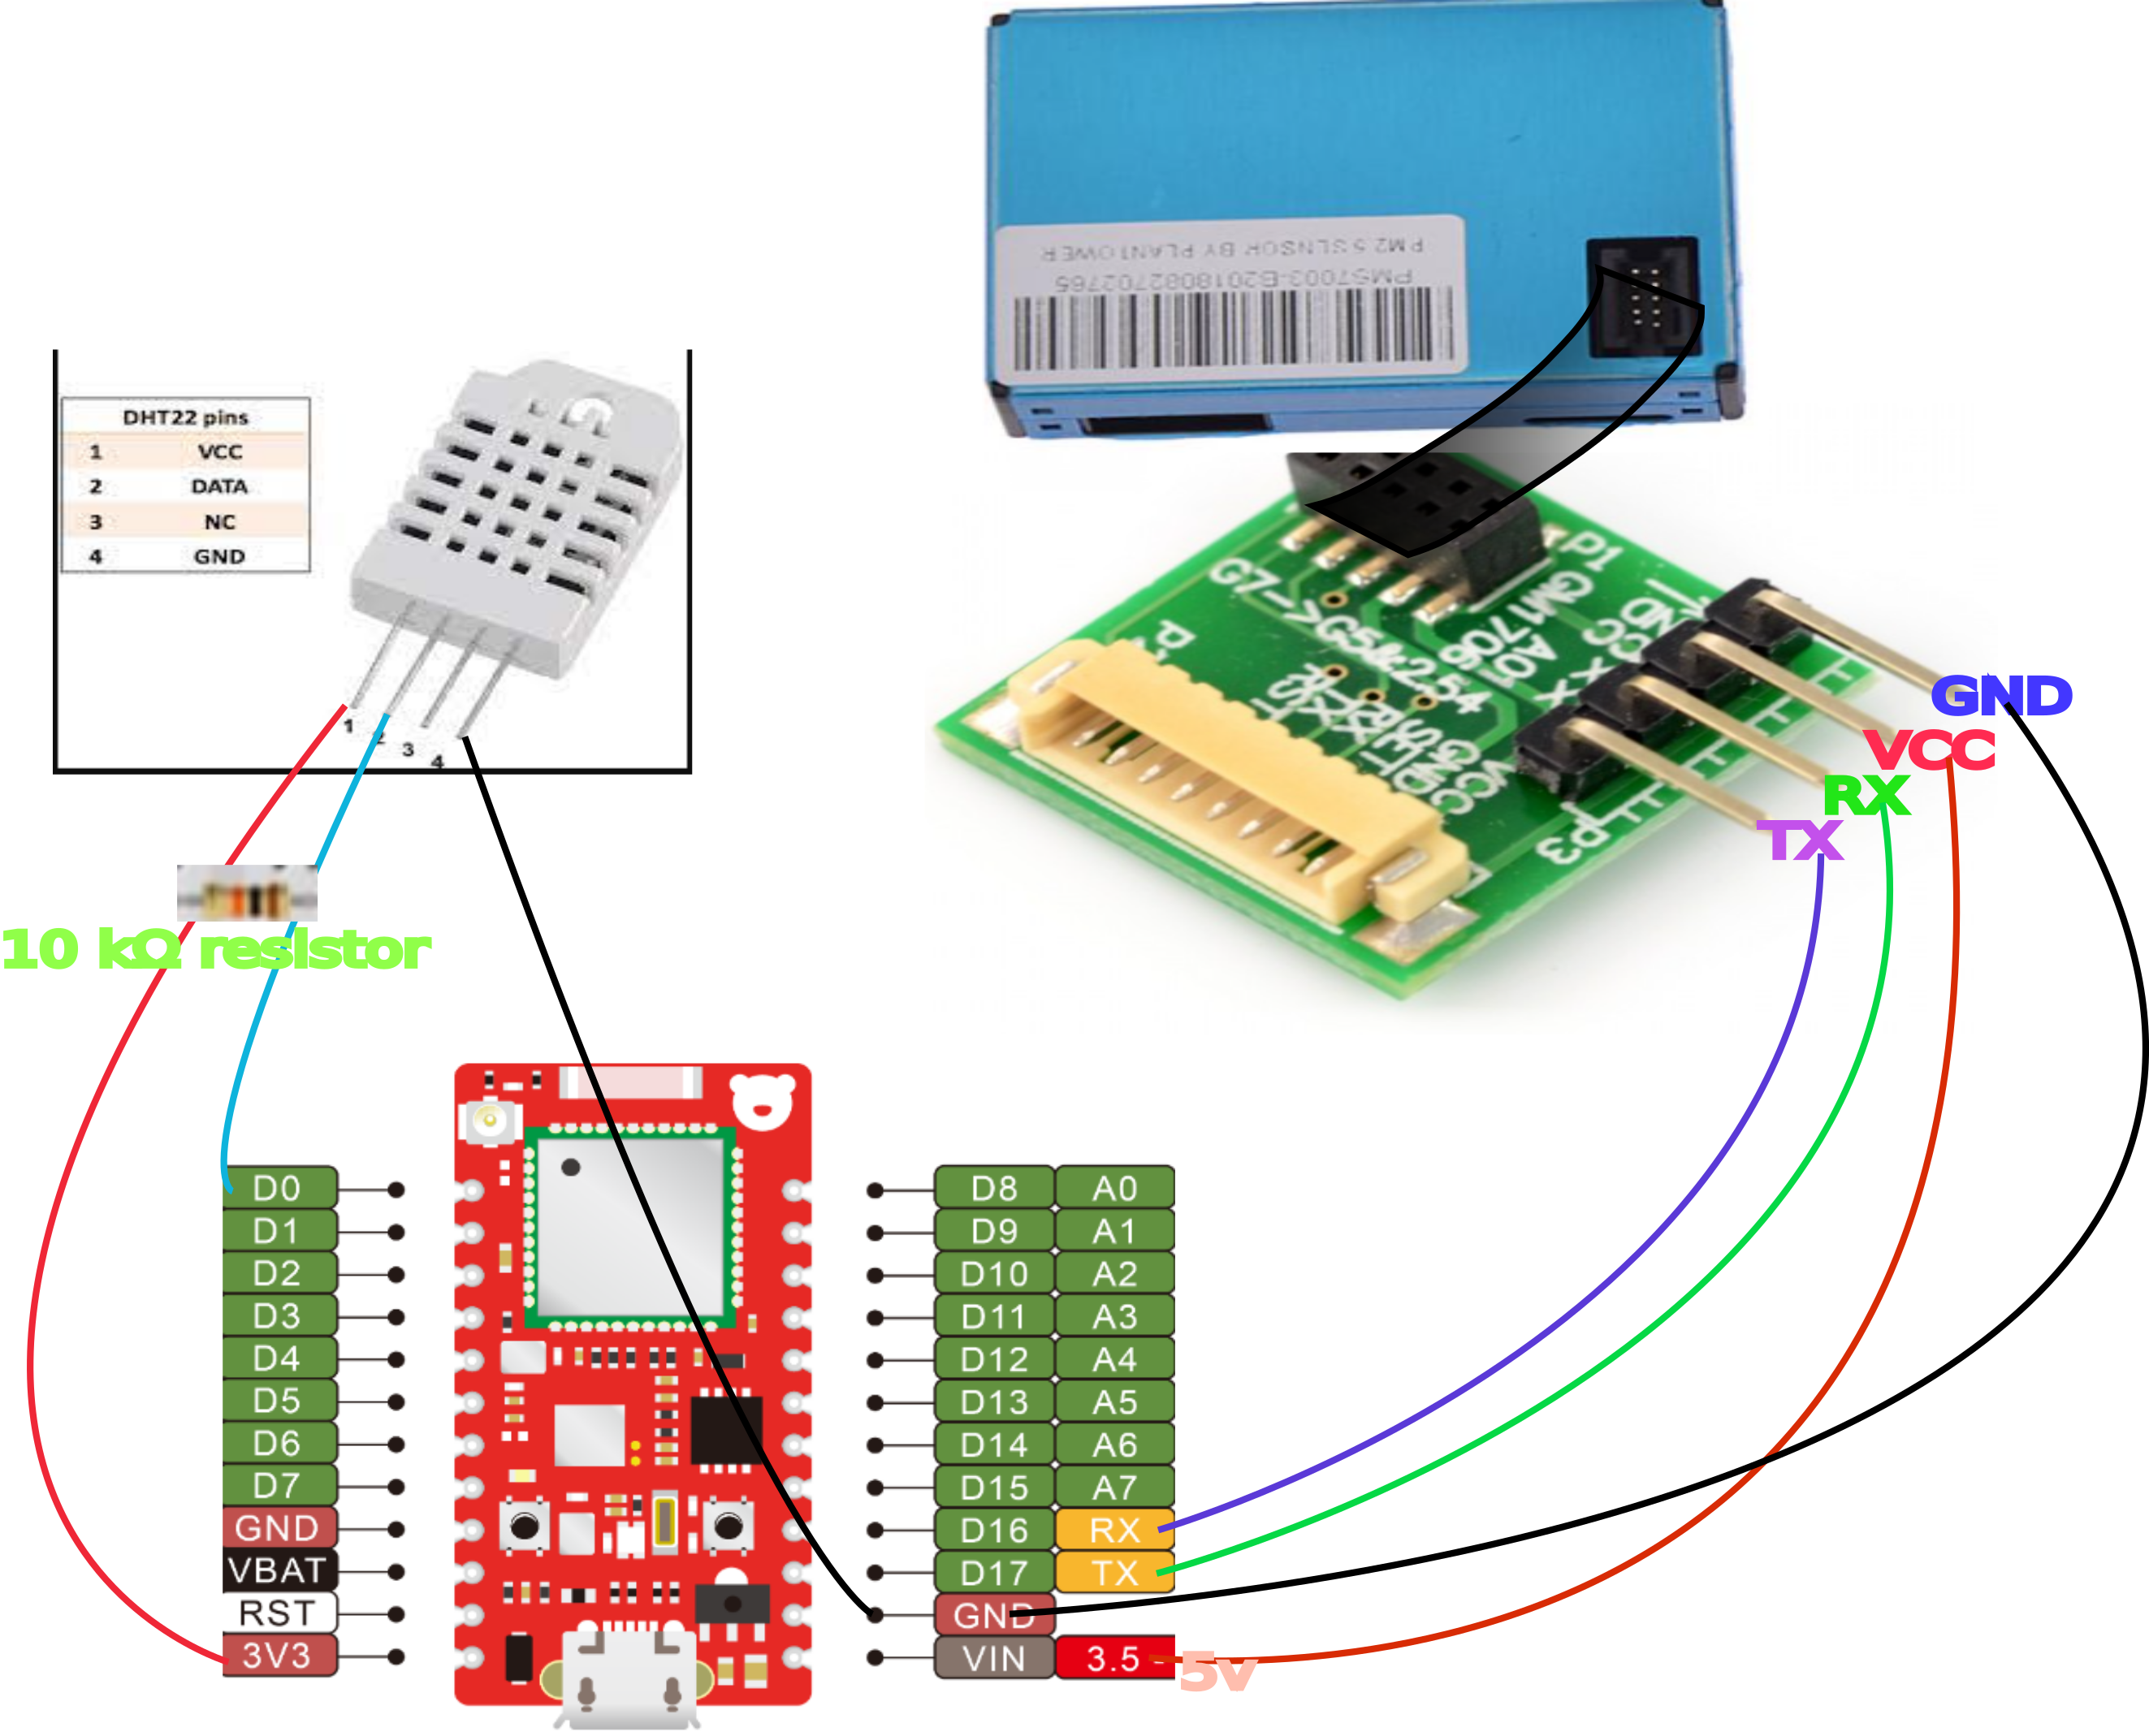
The Hardware wiring diagram
Plug in your device and connect it to particle.io
I used the following guide for the Redbear DUO here
Coding the application
- Go to console.particle.io, open the IDE by clicking the icon (bottom left < >)
- Create a new application.
- Click the “Libraries” icon on the bottom left of the screen.
- In the “Libraries” search enter “PMS7003-Particle-Sensor-Serial” and import it into the project.
- Click “Libraries” again, and search for “Adafruit_DHT_Particle” and import it into the project.
Paste this code into your app:
// This #include statement was automatically added by the Particle IDE.
#include <Adafruit_DHT_Particle.h>

// This #include statement was automatically added by the Particle IDE.
#include <PMS7003-Particle-Sensor-Serial.h>

PMS7003Serial<USARTSerial> pms7003(Serial1, D0);

#define DHTPIN D0     // what pin we're connected to

// Here we define the type of sensor used
#define DHTTYPE DHT22       // DHT11 or DHT22

DHT dht(DHTPIN, DHTTYPE);


void setup() {
    //Serial.begin();
  dht.begin();

}

unsigned long last = 0;
unsigned long last_pm_reading = 0;

void loop() {

  unsigned long now = millis();

  // check every time to see if there is data
  if (pms7003.Read()) {
    last_pm_reading = now;
  }

  if ((now - last) > 10000) {
    float f = dht.getTempFarenheit();
    float h = dht.getHumidity();
    Particle.publish("TempDegreesF", String(f));
    Particle.publish("PercentHumidity", String(h));
    // Let us be generous. Active state the device
    // reports at least every 2.3 seconds.
    if ((now - last_pm_reading) > 10000) {
      Particle.publish("No reading for at least 10 seconds!");
    } else {
      Particle.publish("pm1", String(pms7003.GetData(pms7003.pm1_0)));
      Particle.publish("pm2_5",String(pms7003.GetData(pms7003.pm2_5)));
      Particle.publish("pm10",String(pms7003.GetData(pms7003.pm10)));
      // I didn't use these but they're there if you want them in the future.
      /*Serial.println("um_3:" + String(pms7003.GetData(pms7003.count0_3um)));
      Serial.println("um_5:" + String(pms7003.GetData(pms7003.count0_5um)));
      Serial.println("um1:" + String(pms7003.GetData(pms7003.count1um)));
      Serial.println("um2_5:" + String(pms7003.GetData(pms7003.count2_5um)));
      Serial.println("um5:" + String(pms7003.GetData(pms7003.count5um)));
      Serial.println("um10:" + String(pms7003.GetData(pms7003.count10um))); */
    }
    last = now;
  }
}
Flash the application to the device
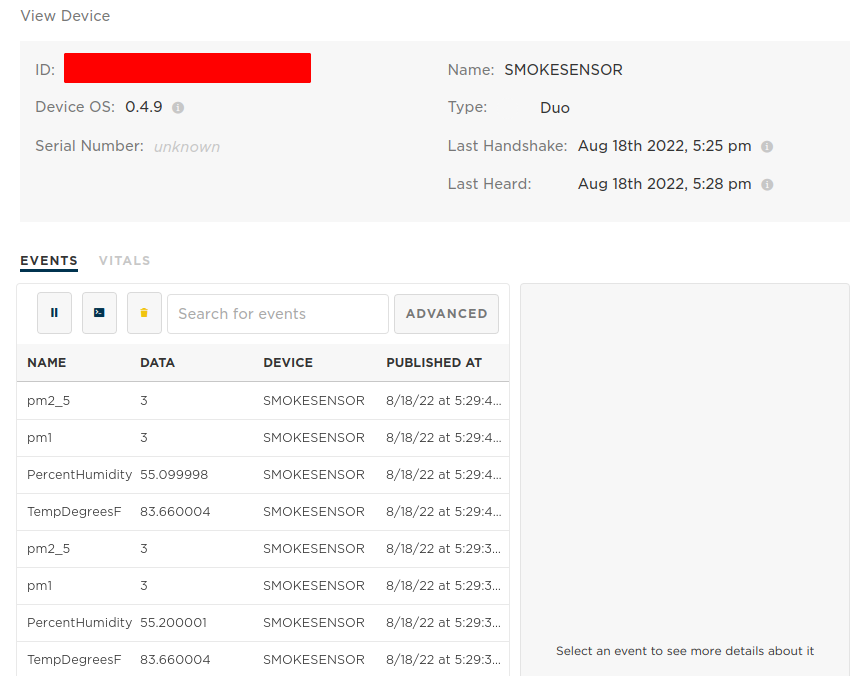
You should see events coming into the particle.io console
Now we’re ready to setup InfluxDB
- Create a new bucket called “sensors” (or whatever you like)

- Keep this window open or copy these settings, we need them to setup particle.io webhooks.
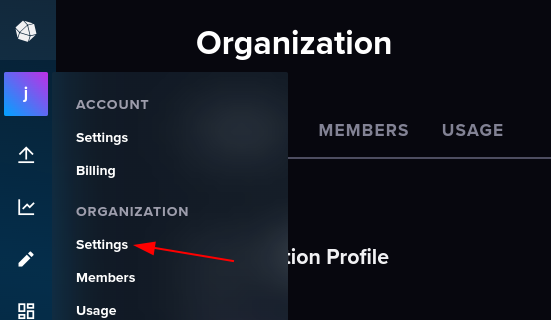
- Open organization settings
- Copy the info for ClusterURL and OrganizationID

- Go to tokens and generate a new API token (and save it for the next step!)

Go back to particle.io console “Integrations”
-
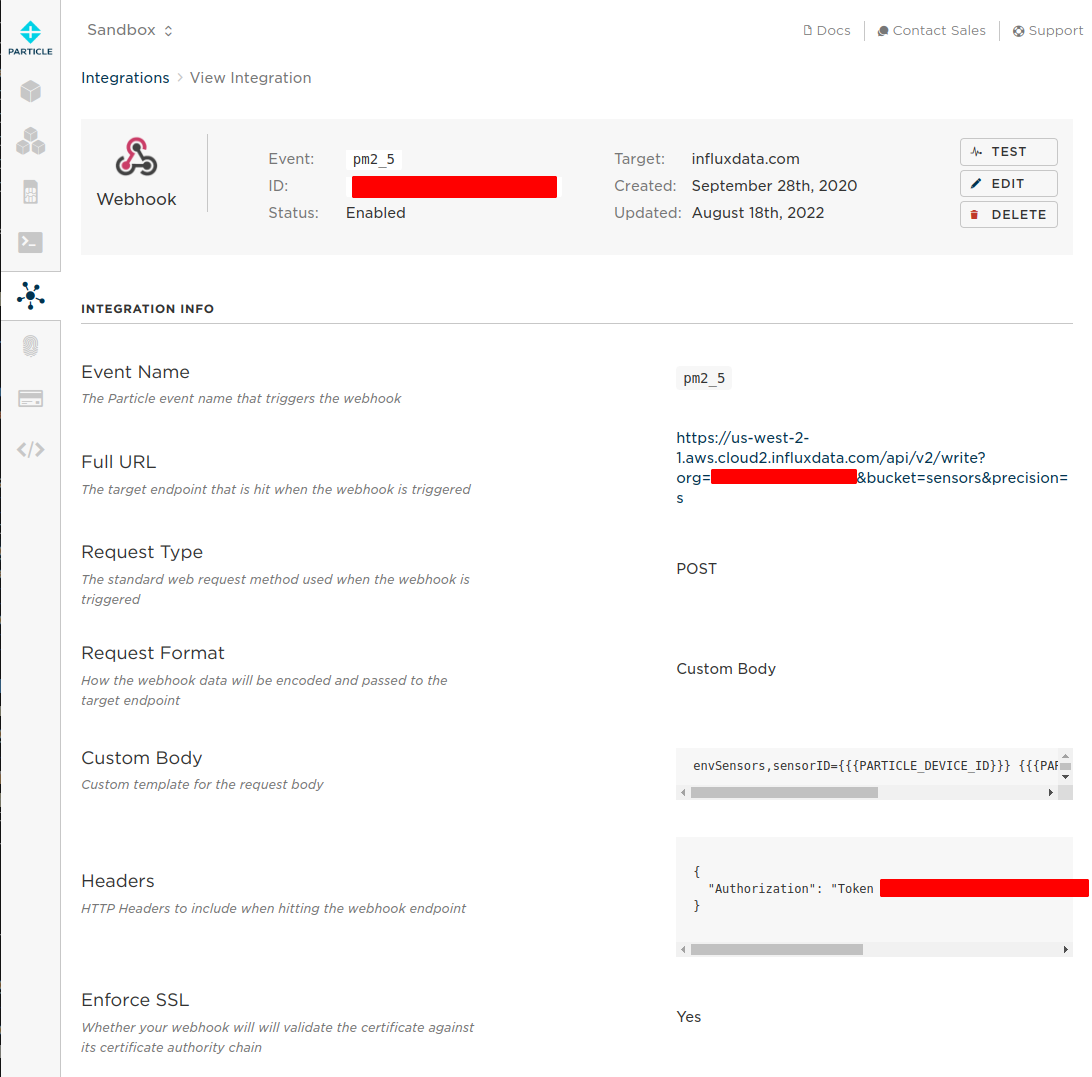
Create new WebHook Integration
Setting Value Event Name pm2_5 URL https://YourClusterURL/api/v2/write?org=YourOrganizationID&bucket=sensors&precision=s Request Type POST Request Format Custom Body Device Any Status Enabled -
Expand the Advanced Settings!
Setting Value Custom Request Body envSensors,sensorID={{{PARTICLE_DEVICE_ID}}} {{{PARTICLE_EVENT_NAME}}}={{{PARTICLE_EVENT_VALUE}}} HTTP HEADERS (two fields) Authorization Token YOUR-API-TOKEN -
After you’re done creating the webhook it should look like this ->
-
While viewing the webhook we should start to see the webhook logs below ->
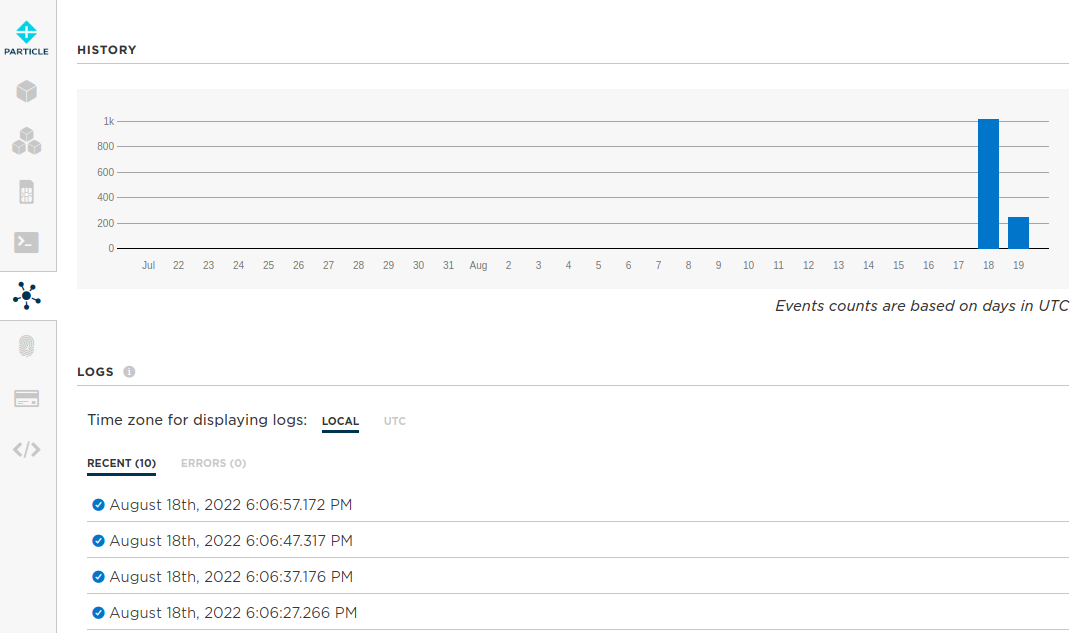 You can inspect the logs by clicking a response. Hopefully all is well so far.
 -
Repeat the steps above for Temperature and Humidity (change the Event Name)
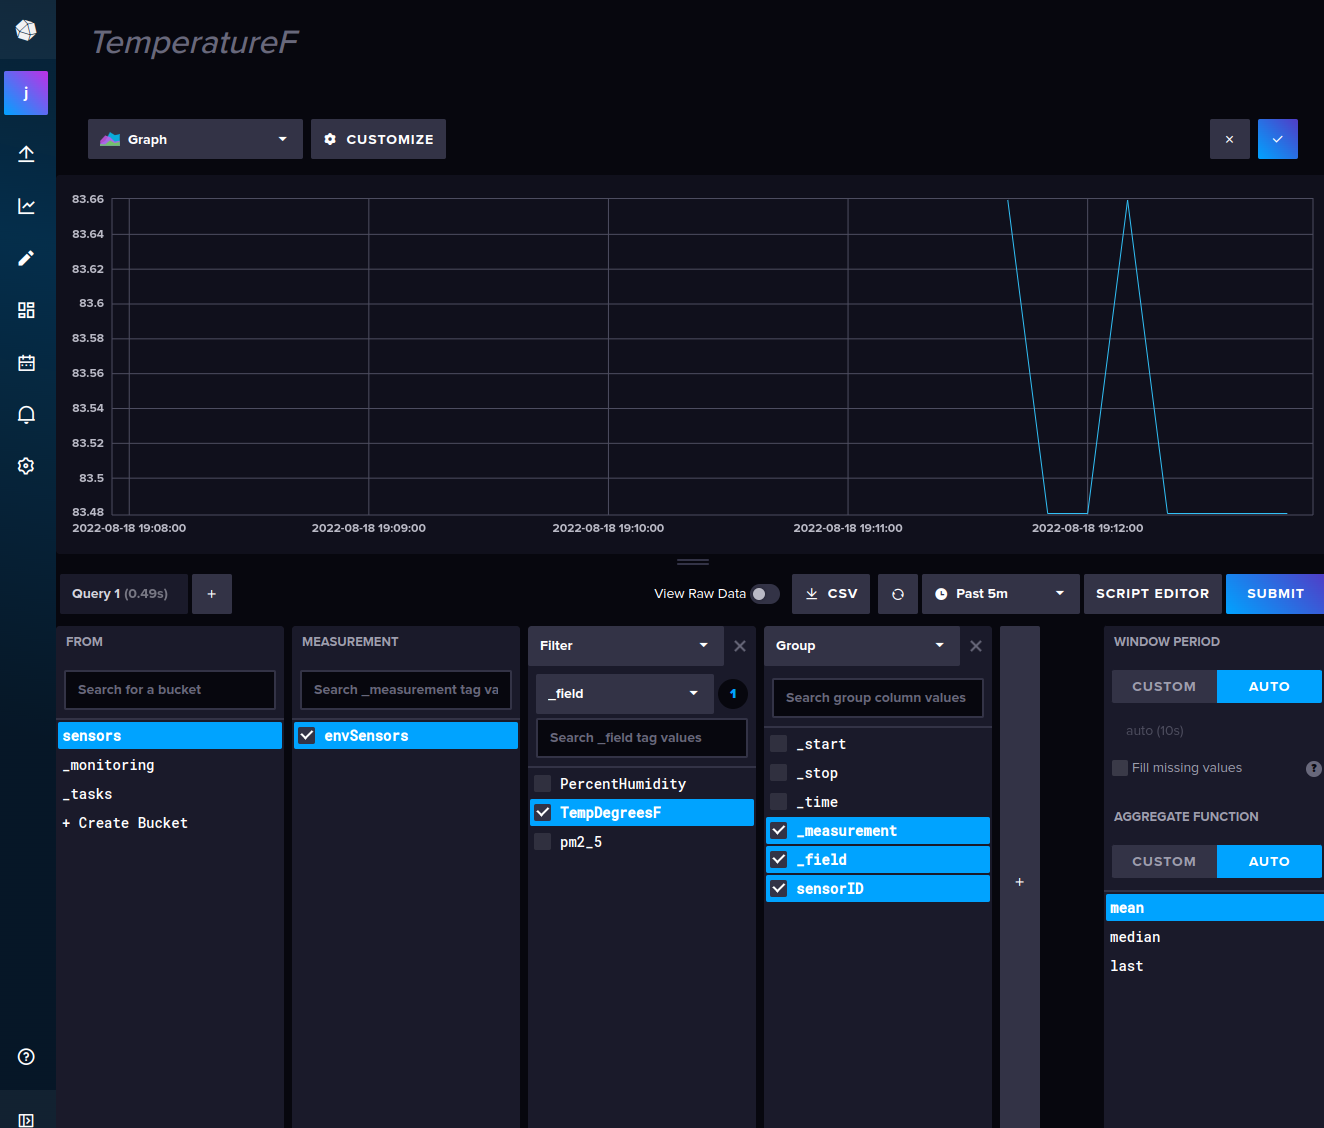
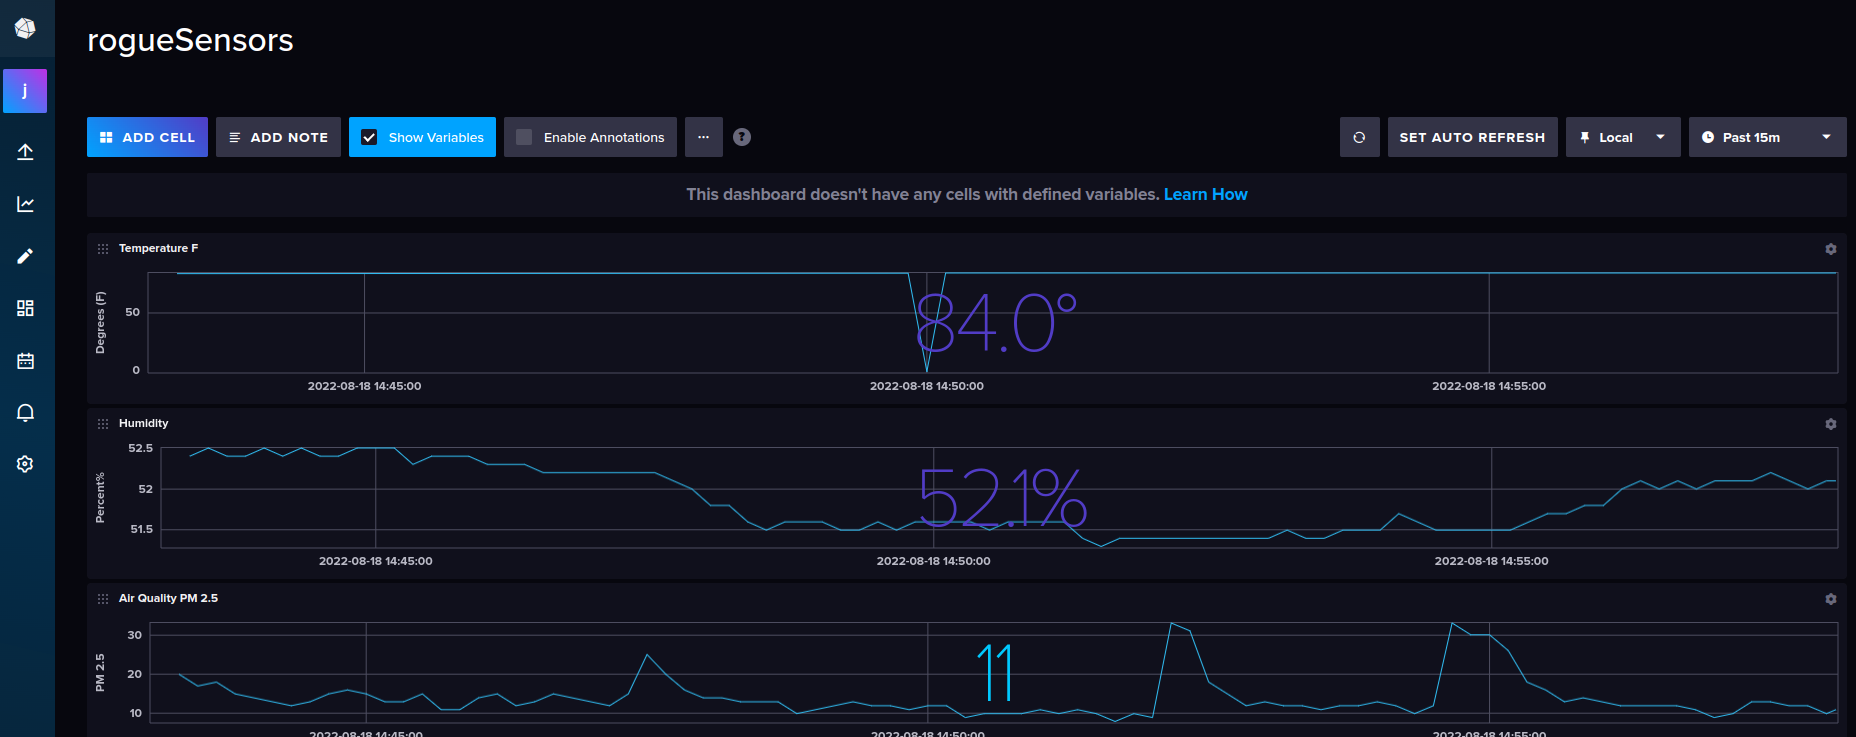
Now we can build an influxDB dashboard!
- You can create a new dashboard and play around. For example: create a new cell.
- Use QUERY BUILDER to point-and-click the sensor data.